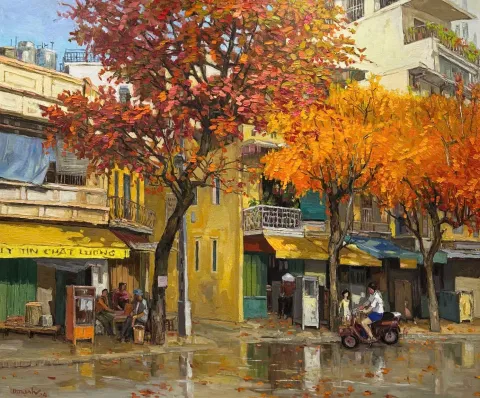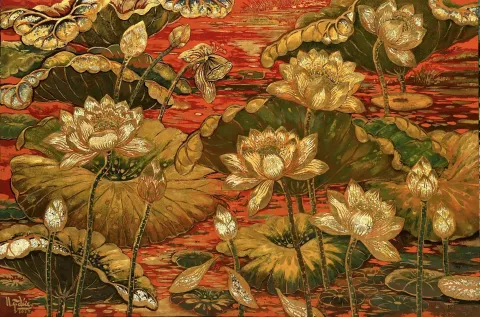
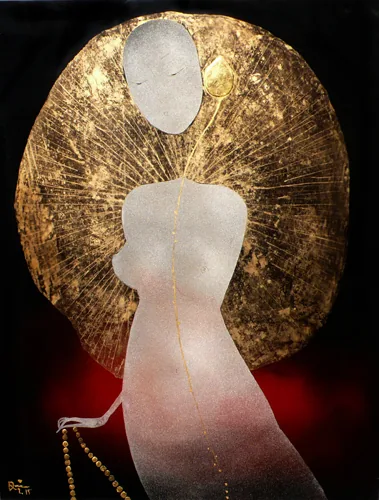
When you stand in front of a great Vietnamese lacquer painting, it is almost impossible to understand how it was made. The surface has a depth and luminosity unlike anything in Western painting – you can almost see into it, as though the image exists not on the surface but somewhere within the material itself. Understanding how son mai is made does not diminish that mystery. If anything, it deepens it.
This is a complete guide to the process – from the first coat of lacquer on bare wood to the final moment of polishing when the painting is revealed.
The Raw Material: Son Ta
Everything begins with son ta – natural lacquer resin harvested from the Rhus succedanea tree, known in Vietnam as the son tree. These trees grow primarily in Phu Tho province in northern Vietnam, where the climate and soil produce a resin of particularly high quality.
Son ta is harvested by making incisions in the bark of the tree and collecting the sap that flows out – a process very similar to rubber tapping. The raw sap is a milky, pale liquid that darkens and thickens on exposure to air. In its processed form, ready for use as a painting medium, son ta ranges from amber to dark brown.
The quality of the son ta is fundamental to the quality of the finished work. Artists working at the highest level are extremely selective about their lacquer source – the chemical composition of the resin affects how it cures, how it polishes, and ultimately how the finished surface looks and feels. This is one reason why genuine fine-art lacquer work cannot be cheaply replicated: the materials themselves are significant.
Step 1: Preparing the Board
A lacquer painting is made on a rigid wooden board – never on canvas, which would flex and crack the lacquer. Teak and pine are most commonly used, chosen for their stability and resistance to warping. The board is cut to size and the surface is sanded progressively finer until it is completely smooth.
The first coats of lacquer are mixed with a filler – traditionally powdered ash or fine sawdust – to create a priming layer that seals the wood and provides a stable base for the painting layers above. This primer may be applied in two or three coats, each dried completely before the next is applied. At this stage the board looks nothing like a painting – it is simply a dark, sealed wooden panel.
Step 2: Building the Layers
This is the longest and most demanding part of the process. A finished lacquer painting typically contains between 15 and 25 individual layers, though some artists working on major pieces apply considerably more. Each layer must dry completely – a process that takes several days in the workshop environment – before the next is applied.
Between layers, the artist works. This is where the painting actually happens – not in a single act of mark-making, but in a slow accumulation of decisions made over months.
The materials that can be embedded between lacquer layers include:
Eggshell (vo trung): One of the most distinctive materials in the son mai vocabulary. Eggshell is used to create white, ivory and off-white areas – the only reliable source of bright white in the lacquer palette, since white pigments do not mix well with lacquer resin. The shell is broken into small fragments, sometimes very small, and laid individually onto the wet lacquer surface. When the next layer is applied and polished, the eggshell is revealed at the surface, its natural iridescence preserved. The effect ranges from smooth areas of even white tone to deliberately fragmented textures that catch the light in complex ways.
Gold and silver leaf (vang bac dat mong): Precious metal leaf is applied to the lacquer surface in sheets so thin they are almost weightless. Gold leaf creates warm, luminous highlights and backgrounds; silver leaf (which is often treated to prevent tarnishing) produces cooler tones. The leaf is applied to a tacky lacquer surface and burnished down, then partially covered by subsequent layers and polishing – the result is a glow that comes from within the surface rather than sitting on top of it.
Mother-of-pearl inlay (xa cu): Larger pieces of iridescent shell, cut and shaped to fit specific areas of the composition. Xa cu adds colour and pattern that shifts as the viewing angle changes – blues, greens, pinks, purples – in ways that lacquer pigments cannot achieve. It is used more selectively than eggshell, typically for areas where the artist wants a specific shimmering accent.
Coloured lacquer (son mau): Pigments mixed directly into the lacquer resin. The traditional palette is limited compared to oil painting – deep reds, blacks, and a range of earth tones – but modern artists have expanded this through careful use of mineral and synthetic pigments that are stable in the lacquer medium. The colour of lacquer pigments changes as they dry and polish, which means the artist must work from experience and memory rather than seeing the final colour during application.
Step 3: The Polishing
When all layers have been applied and the final layer has fully cured, the polishing begins. This is the most technically demanding stage of the process – and the most revealing.
Polishing is done by hand, working through progressively finer abrasives: coarse pumice to remove the highest peaks of the surface, then medium pumice, then fine charcoal, and finally a paste made from a very fine abrasive mixed with oil. At each stage, material is removed from the surface – and as it is removed, the layers beneath begin to appear.
The artist cannot fully predict what will be revealed during polishing. The relationships between layers – how eggshell sits against a layer of gold, how a transparent colour wash interacts with the dark ground beneath – are only fully visible once the surface has been cut back to reveal them. This is why lacquer painting requires a particular kind of trust in the process: you commit to a course of action across months of work and only discover the result at the end.
The final polishing stage uses a very fine paste and the painter's own hand – no tools – to bring the surface to its finished state. A master lacquer painter can feel through their fingertips whether the surface is ready, whether another pass is needed, whether the depth and luminosity are what the work requires.
Why This Process Matters
Understanding this process changes how you look at lacquer paintings. Every surface is the result of months of patient, skilled work. Every area of eggshell was laid fragment by fragment. Every highlight of gold leaf was applied, covered, and slowly revealed. The luminosity you see is not a trick of varnish or glaze – it is the genuine optical depth of a surface built from many transparent layers, each one contributing to what the eye perceives.
This is also why great son mai works are not cheap to produce and cannot be honestly replicated at low cost. The time, the skill, the materials, and the irreversibility of every decision made during the process – these are what you are buying when you acquire a genuine Vietnamese lacquer painting.
Come and See for Yourself
At Hanoi Art Gallery, our team can walk you through the techniques used in any specific work in our collection – explaining what materials were used, how particular effects were achieved, and what the process reveals about the artist's intentions. We believe that understanding how a painting is made is part of understanding the painting itself.
36-38 Trang Tien Street, Hanoi | hanoiart36@gmail.com | WhatsApp/Zalo: +84 984 589 999